Once you start to fill up your site with pages and posts, things can start to look cluttered. Categories, tags and menus can help group some ideas, separate others and help users navigate to where they need to go.
Categories are broad sections you can use to group posts together. For a sports website, categories might include things like “Football”, “Rugby”, “Formula One”, etc. A post can sit in one or more categories in WordPress.
Tags are keywords you would use on posts across your website to show they’re related, despite being in different categories, or show certain posts within a large category are linked.
For that sports website, tags might include “stats”, “injuries”, “finals”, “upsets”, etc.
Menus are navigational tools users need to use to click across your different categories or pages. These are usually displayed at the top of the site (header menus), the bottom (footer menus) and elsewhere.
Check out the video below to learn how to add categories, tags and menus to your site, or read the rest of the post below.
Adding categories

You can either add new categories from the main menu on your WordPress dashboard (hover over Posts and choose Categories) or you can add them to posts are you’re creating them.
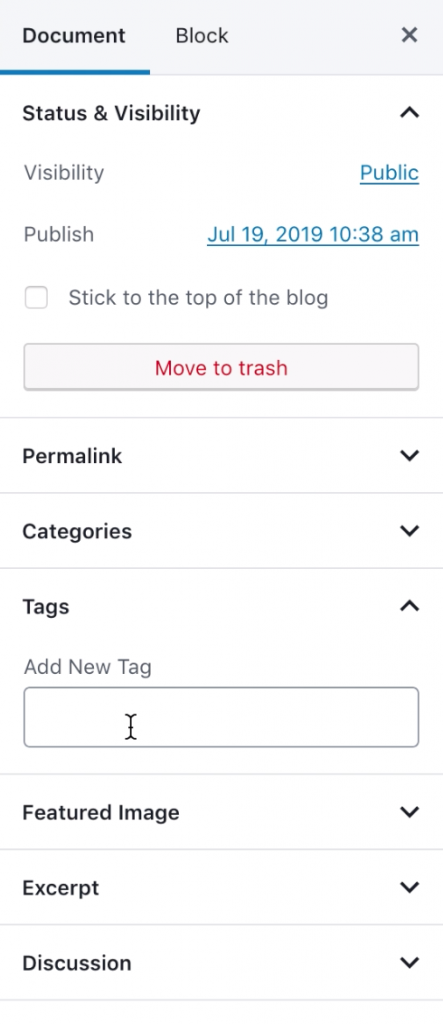
In the document tab on the right sidebar in your post editor, click on Categories.
Here, you can tick to select which category you’d like the current post to sit in, or you can type in a category name to add a new category to your website.
Once you’ve selected or created your categories, be sure to save a draft, publish or update your post to save these changes.
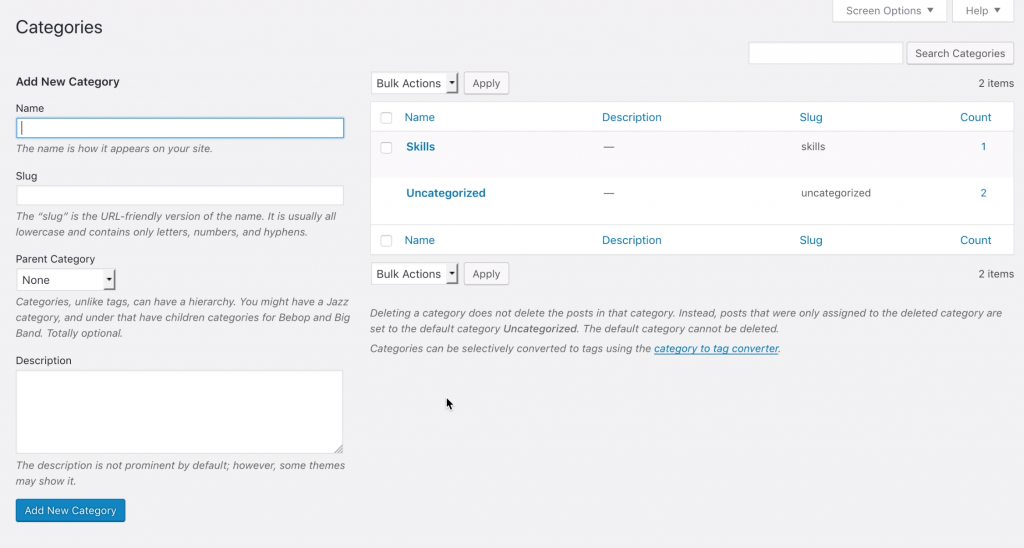
To view and manage your categories, hover over Posts on the main WordPress menu (on the left) and select Categories.
Here you can create new categories, give them descriptions or delete categories you no longer need. (n.b. Deleting categories doesn’t delete the posts within those categories)
Adding Tags
You can also add and manage tags the same way as categories: from either the WordPress dashboard or from a post you’re working on.
To add new tags to your post from the post editor, click on Tags on the sidebar on the right. Here you can add new tags or use existing tags.
Type in any number of tags at once by separating them by a comma.
Once you’ve typed them in, be sure to save a draft, publish or update your post to save these changes.
To manage your tags, hover over Posts and click on Tags on the main WordPress menu. Here you can add, remove and add descriptions for different tags.
Adding Menus
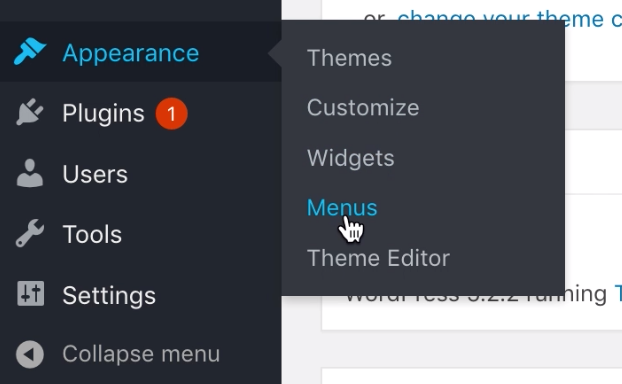
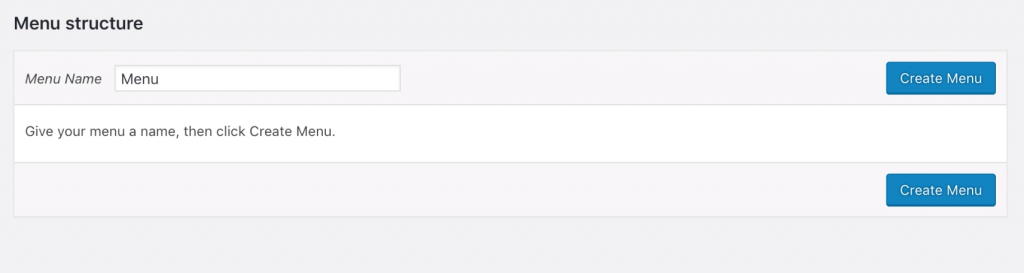
To create a menu for users to navigate your site, hover over Appearance in the main WordPress menu and select Menus.
You can then enter a name for your menu (this is only seen by you) and click Create Menu.
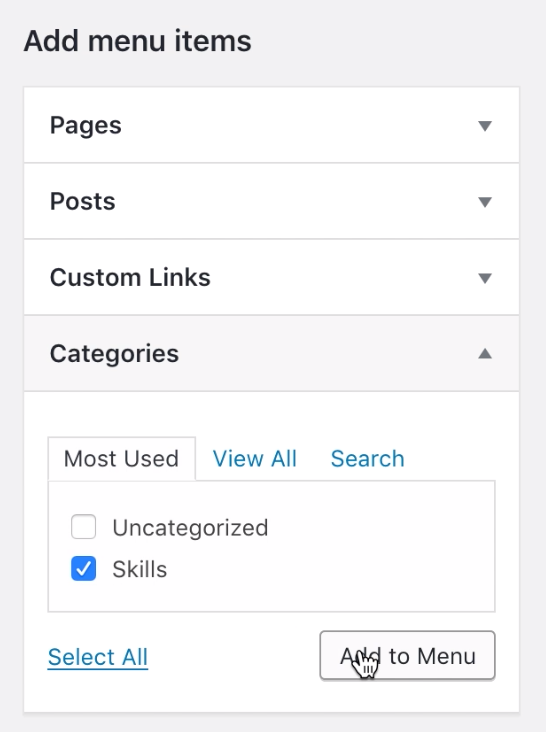
To add items to your menu, choose from the different options on the left.
You can include pages you’ve created (such as your Home or About page), individual posts, custom links (URLs you’d like to link out to from your navigation- such as a YouTube channel or an external website you manage), or the various post categories you’ve created earlier.
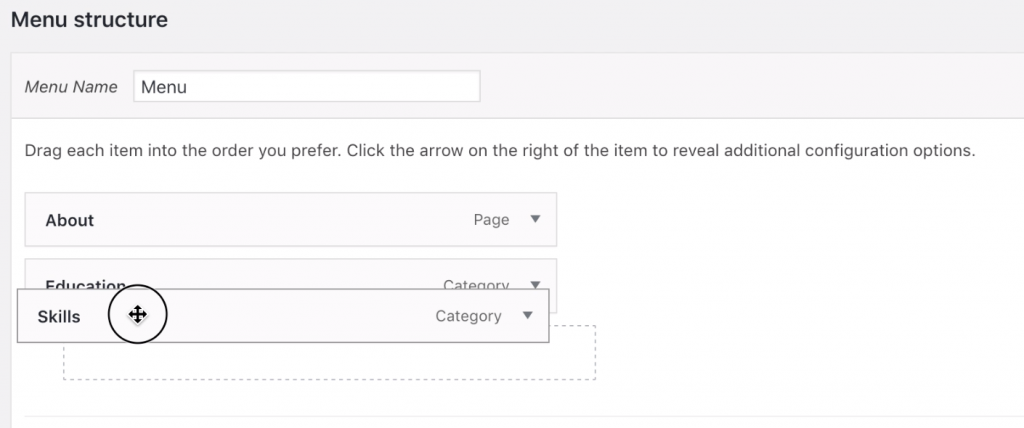
You can drag and drop menu items to reorder how they appear on your website or nest menu items under other items in order to create a drop-down menu as show below:
Once you’ve finished creating your menu, you need to tell WordPress where to display it. If you’re using this as the primary menu (often a menu in the header of your website) check the Primary Menu box in Menu Settings.
You can also create menus to go on the footer of your site, and many themes also support the use of social menus for links to Twitter, Facebook, LinkedIn, etc.
Be sure to select Save Menu to push any changes to your live site.
*This post was derived from the Coventry.Domains Support Documentation under CC BY-NC 4.0.