
A previous post gave an overview of how to add posts/pages to your WordPress site. This post provides a more in-depth tutorial of what’s called the Block Editor. For reference, the code that runs the Block Editor is called Gutenberg. The Block Editor gives you the ability to add rich media to your posts and pages with an easy drag-and-drop interface.
There are far too many features to cover in one post, but watching the video below will give you a great sense where to get started with adding all kinds of media to your website. Or, if you prefer, you can read the post below where we’ll cover a few of the main tools within Gutenberg you should know about.
What are blocks?
Blocks are elements you can use to build your post or page. Gutenberg supports dozens of them including paragraphs, images, embedded videos and more. There are also blocks to help you with formatting and layout, like columns, rows, bulleted lists, and spacers.
Adding a new block
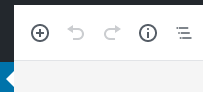
When creating or editing a page or post, click on the plus icon on the top left to add a new block to your current place in the editor.
You can also simply press enter/return on your keyboard when typing, and your next paragraph will be created on its own block.
Moving blocks

One of the main benefits to this block-based system is that you can easily change the position of the blocks you’ve created.
Hover over any block you’ve made, and you’ll see up and down arrows appear to the left of that block. Use them to move blocks up or down once in the document, or click on the dots between the arrows to pick up the block and drag it to a new location anywhere on the page.
You can also highlight multiple blocks at once and move them as a group.
The Contextual Menu
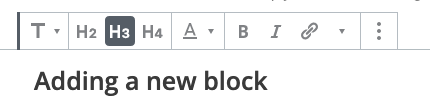
When editing a block, you’ll see a menu pop up at the top of it.
This menu is contextual and will change depending on what type of block you’re editing. For this heading block, there are options to change it to different types/sizes of heading. For different blocks, you’ll find other options available.
Removing Blocks
To delete any block, click on the three dots in the contextual menu and then select Remove Block. Pressing backspace/delete on an empty block also removes it.
Useful Blocks
There are dozens of blocks to choose from, so it’s well worth creating an experimental page or post just to see how they all work. Since we can’t cover them all here, we’ll just mention some of the most useful ones to get you started.
Images
To add an image, add a new block and look for Image in the common blocks section.
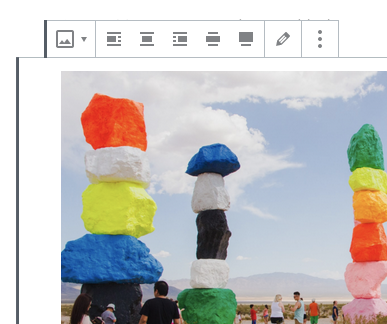
You’ll then be asked to upload a new image or select something from your media library (that’s where all of your images are stored once uploaded to WordPress).
Once you’ve added an image, you can leave it as it is, or use the contextual menu to align it to the left, right or centre of your page. You can also drag the blue dots on the sides of the image to resize it.
There’s also an option in the contextual menu to make your image full width for a dramatic effect.
Lists
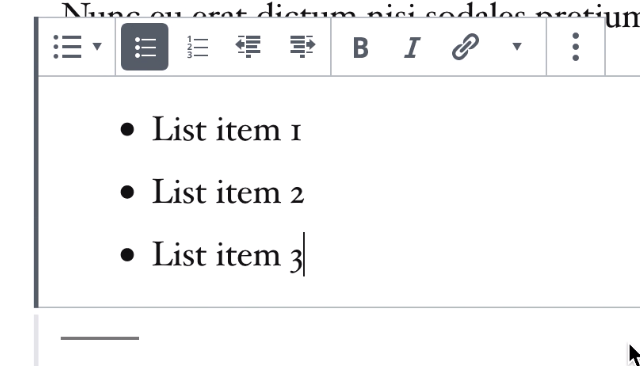
Bulleted or numbered lists can be a good way to organise and present your information. Select List from the common blocks section when adding a new block to create a list.
Here, the contextual menu give you the option to change the type and alignment of your list.
Spacer
If you find your information is looking too cramped or cluttered on the page, adding in some blank space can help. In the layout section, choose Spacer. Simply drag the dot on the bottom of the spacer to adjust its height.
Quotes
If you want to draw attention to a great quote in your content, you can highlight it by adding it as a Quote. Just choose Quote from the common blocks section to add it in:
A woman must have money and a room of her own if she is to write fiction.
Virginia Woolf
YouTube Videos
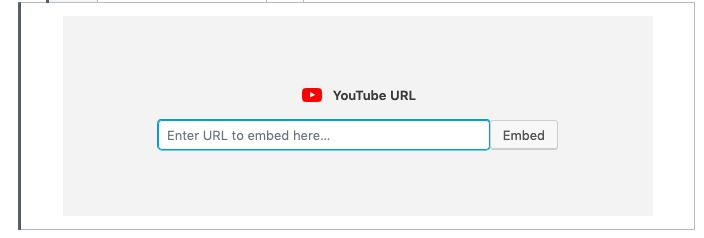
It’s also possible to embed video from YouTube and other sources into your posts. When adding a block, click on YouTube from the embed section.
Here, you’ll just be asked for the video’s link/URL:
You can also embed videos if you have the embed code from YouTube, Vimeo, media.coventry.ac.uk, or other sources. This can be added to the HTML block in Gutenberg.
HTML
This block is a useful catch-all for adding content to your page that comes from other places on the web.
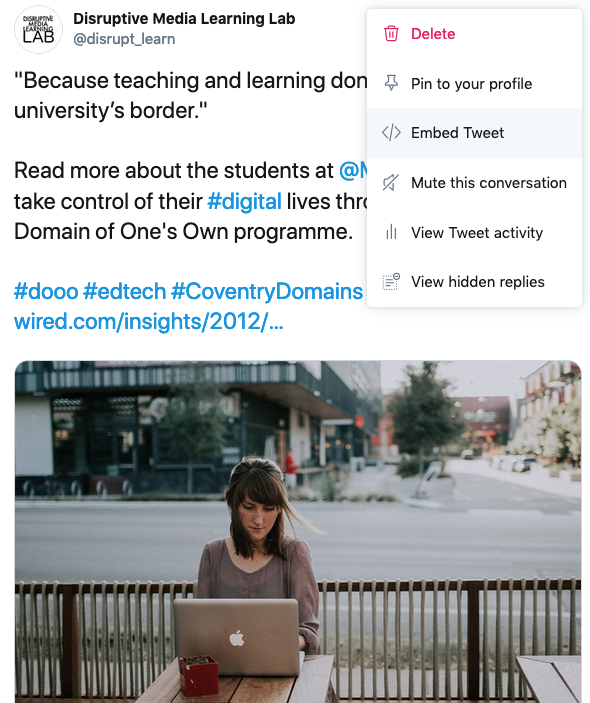
You could, for example, add a specifc Tweet by finding it in Twitter, clicking to drop-down menu on the top right and selecting Embed Tweet. Simply copy this code, come back to WordPress and paste it into the HTML block.
Other Block Settings
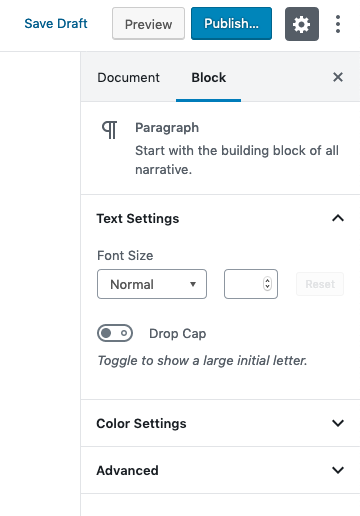
Depending on your block, you’ll have additional settings available in the menu on the right-hand side of the Block editor.
Here, you’ll have option to, for example, change the font size of paragraph blocks.
You could also change the background and text colour of a paragraph to help it stand out more:
Like this paragraph here.
There are so many features to the Block editor to create, organize and style your content, so have a play and see what you can make!
*This post was derived from the Coventry.Domains Support Documentation under CC BY-NC 4.0.


