Overview of Moodle 4 || Moodle 4 Quick Reference || Moodle 4 videos
Building a course
How do I turn editing on to make changes to my course?
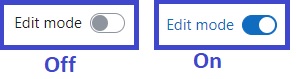
The Turn editing on slider is in the upper right corner of the Moodle course page. Click on the slider to move the slider to the right and enable course editing.
How do I allow students to see my course?
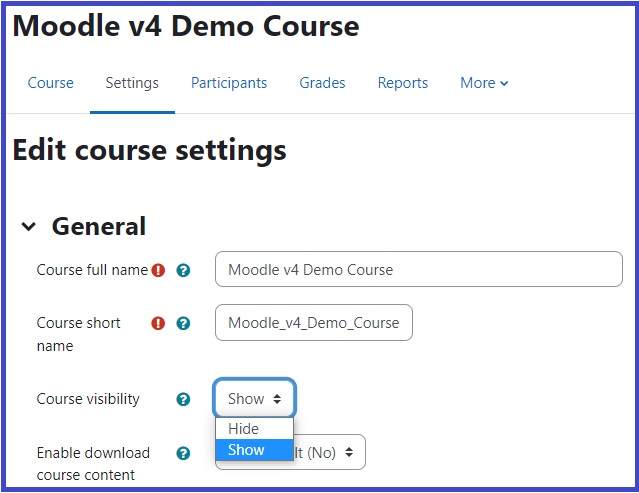
By default, new courses are not visible to students. To allow students to see your course:
- Open the course.
- Select Settings
- Expand the General settings
- Set Course visibility to Show
- Scroll to the bottom of the page and select Save and display.
What do students see when they are in my course?
You can emulate the student view of your course with the following steps:
- Open the course.
- Select your name in the upper right corner of the course page.
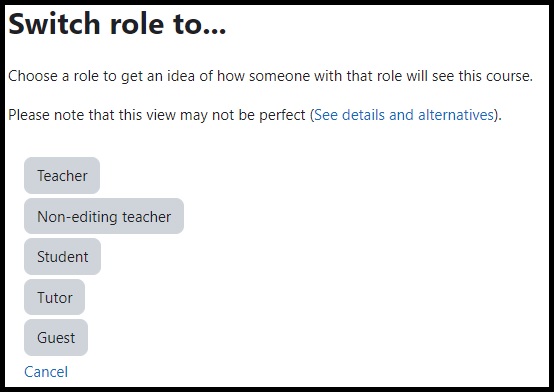
- Select Switch role to…
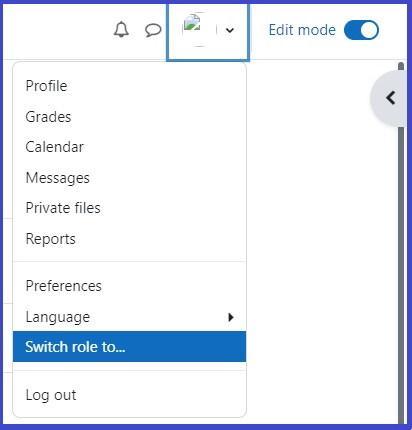
4. Select the role from the list that you would like to emulate:
5. When finished with the alternative view, return to the teacher view by selecting your name again in the upper right corner of the course page. Select Return to my normal role.
How do I reorder content in my course?
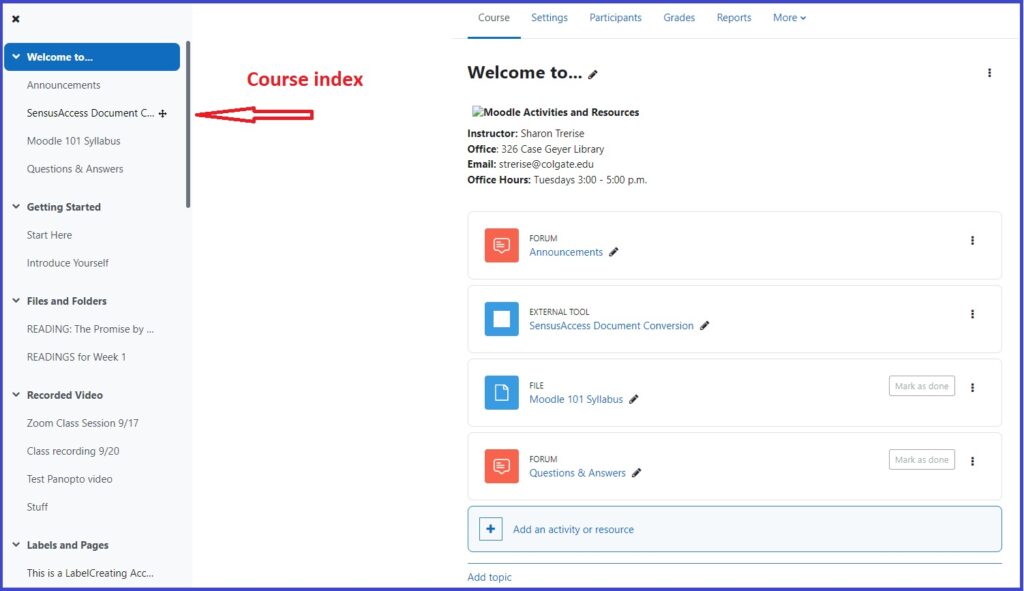
The course index panel on the left side of your course page allows you to drag and drop course activities and topics to reorder them.
- Open the course.
- Toggle the Edit mode slider to the right to turn editing on.
- Click and hold the mouse button while pointing to the item in the course index that you wish to move. Drag it to the desired location then release the mouse button. You can perform the same operation with the topics and activities in the main body of the course page.
How do I turn off auto-linking in my course?
Activity names auto-linking is set to ‘on’ by default in any course. When you type the name of an activity or resource anywhere on your page Moodle will turn that text into a link and direct viewers to the activity or resource. The following steps will turn this feature off:
- Open the course.
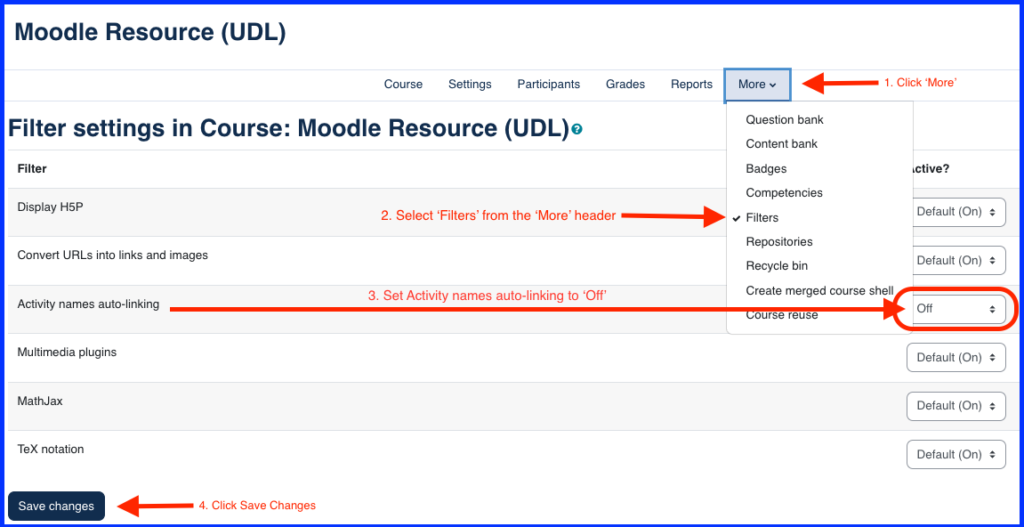
- Click ‘More’ in the navigation bar and select ‘Filters.
- Set Activity names auto-linking to ‘Off’.
- Click ‘Save Changes’.
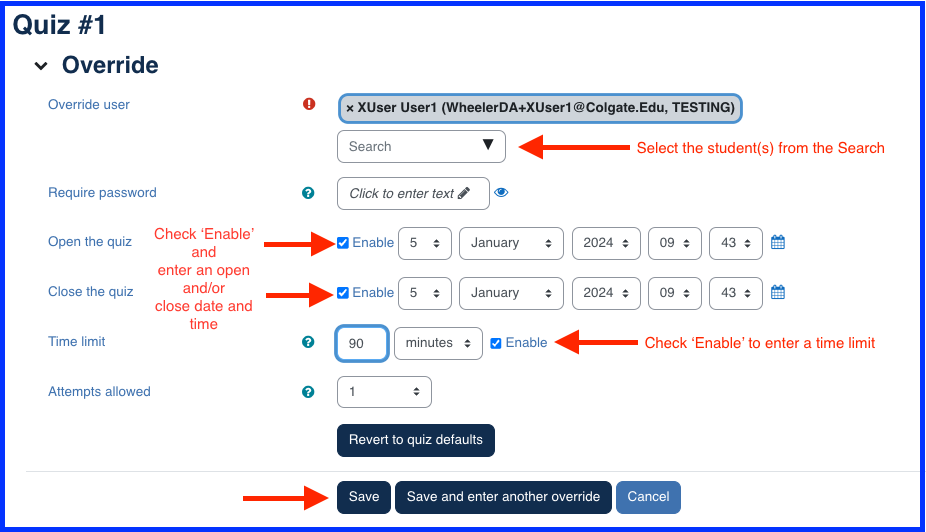
How do I provide a student with more time on an activity or exam ?
If you need to provide individual students with additional time or allow them to take an exam at a different time, you can create an override in any activity that can be timed such as a quiz or assignment. Overrides are only visible to the student they are granted to.
- Open the course.
- Open the activity or quiz.
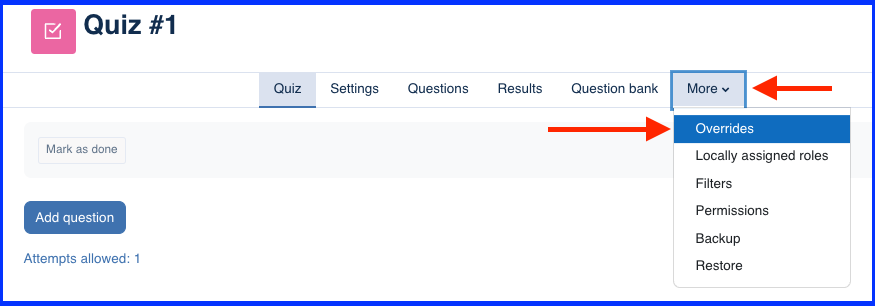
- Click ‘More’ in the navigation bar and select ‘Overrides’.
- Click ‘Add User Override’
- Search for student(s) name
- Enable times for open/close of the activity and time limit and enter desired dates/times.
- Click ‘Save’.

How do I copy content from a previous course?
How do I merge two sections into one Moodle course?
How can I avoid scrolling through a really long course page?
Moodle v4 has helped reduce the amount of scrolling needed to access course content from the main course page by adding two new features, a Course index and a Collapse/Expand topics feature.
Course index
The new Course index lists all topic headings and all activities and resources in a panel on the left side of the course page. Use the Course index to quickly scroll through course components.
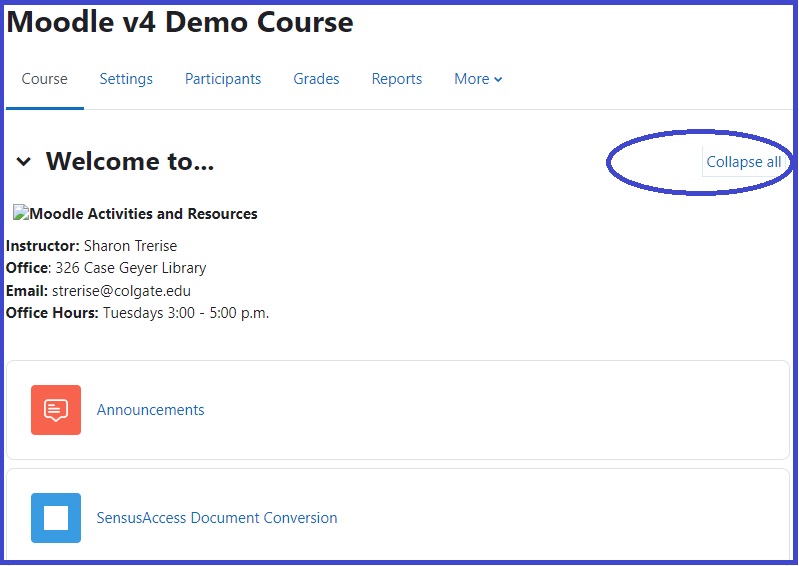
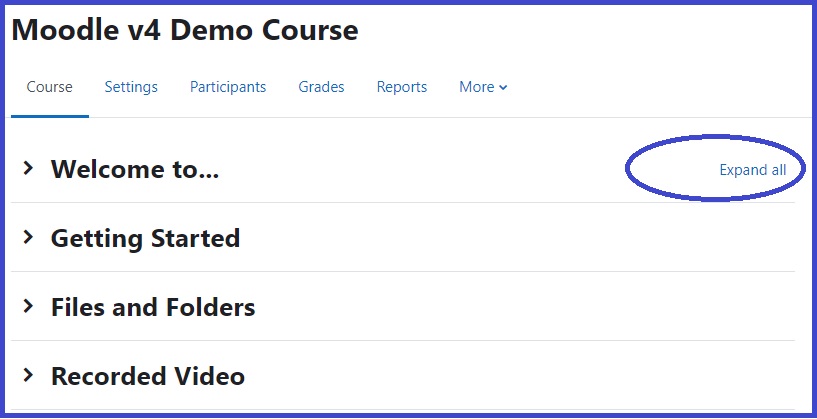
Collapse / Expand topics
A Collapse and Expand feature has been added to the main section of the course home page. If you don’t see this option, see the instructions below to enable it.
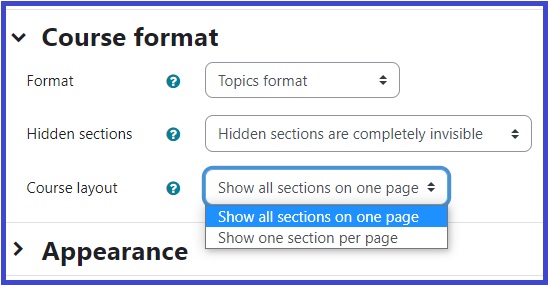
To enable the Collapse / Expand feature:
- Select Settings from the menu under the course name.
- On the Edit course settings page, expand the options for Course format.
- For Course layout, select Show all sections on one page.
- Select Save and display.
Gradebook
How do I allow students to see their gradebook?
By default, new courses have the gradebook hidden from students. To allow students to see their gradebook follow the steps below or watch the Gradebook Visibility tutorial:
- Open the course.
- Select Settings
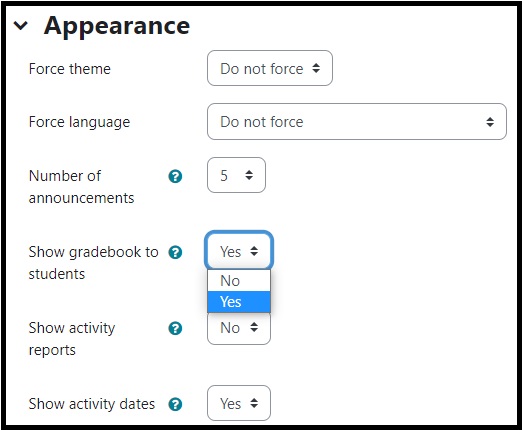
- Scroll down and expand the Appearance settings.
- Set Show gradebook to students to Yes
- Scroll to the bottom of the page and select Save and display.
Where do I find Gradebook setup?
To access all actions related to the Gradebook, including Gradebook setup:
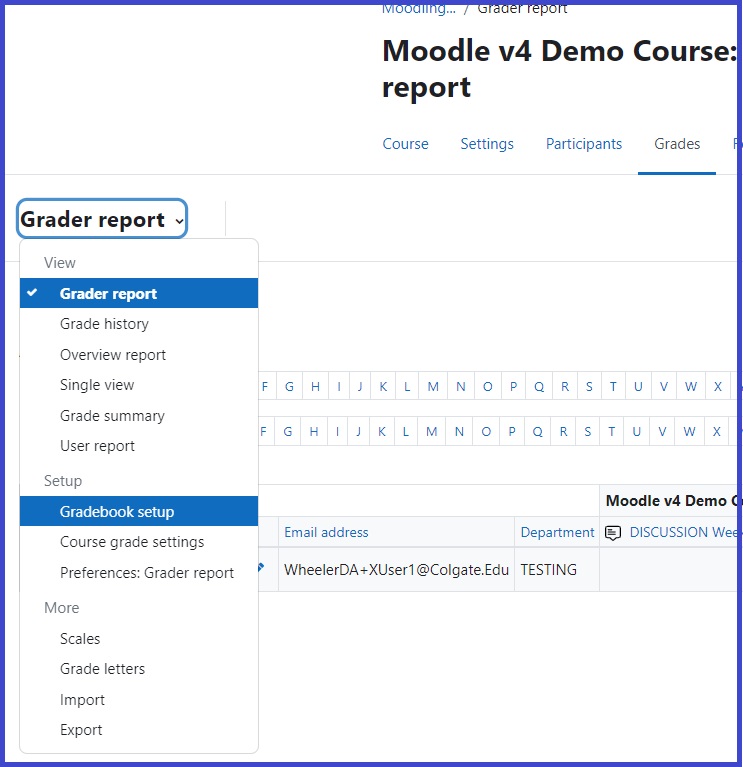
- Select Grades from the menu at the top of the course page under the course name.
- On the Grades page, drop down the menu in the upper left and select Gradebook setup.
How do I add a new grade item?
A grade item is a unit that you would like to add a grade for within the gradebook that is not directly connected to an activity or submission in Moodle. Grades for grade items are entered manually into the gradebook. For example, participation is often entered as a grade item.
- Select Grades from the menu at the top of the course page under the course name.
- On the Grades page, drop down the menu in the upper left and select Gradebook setup.
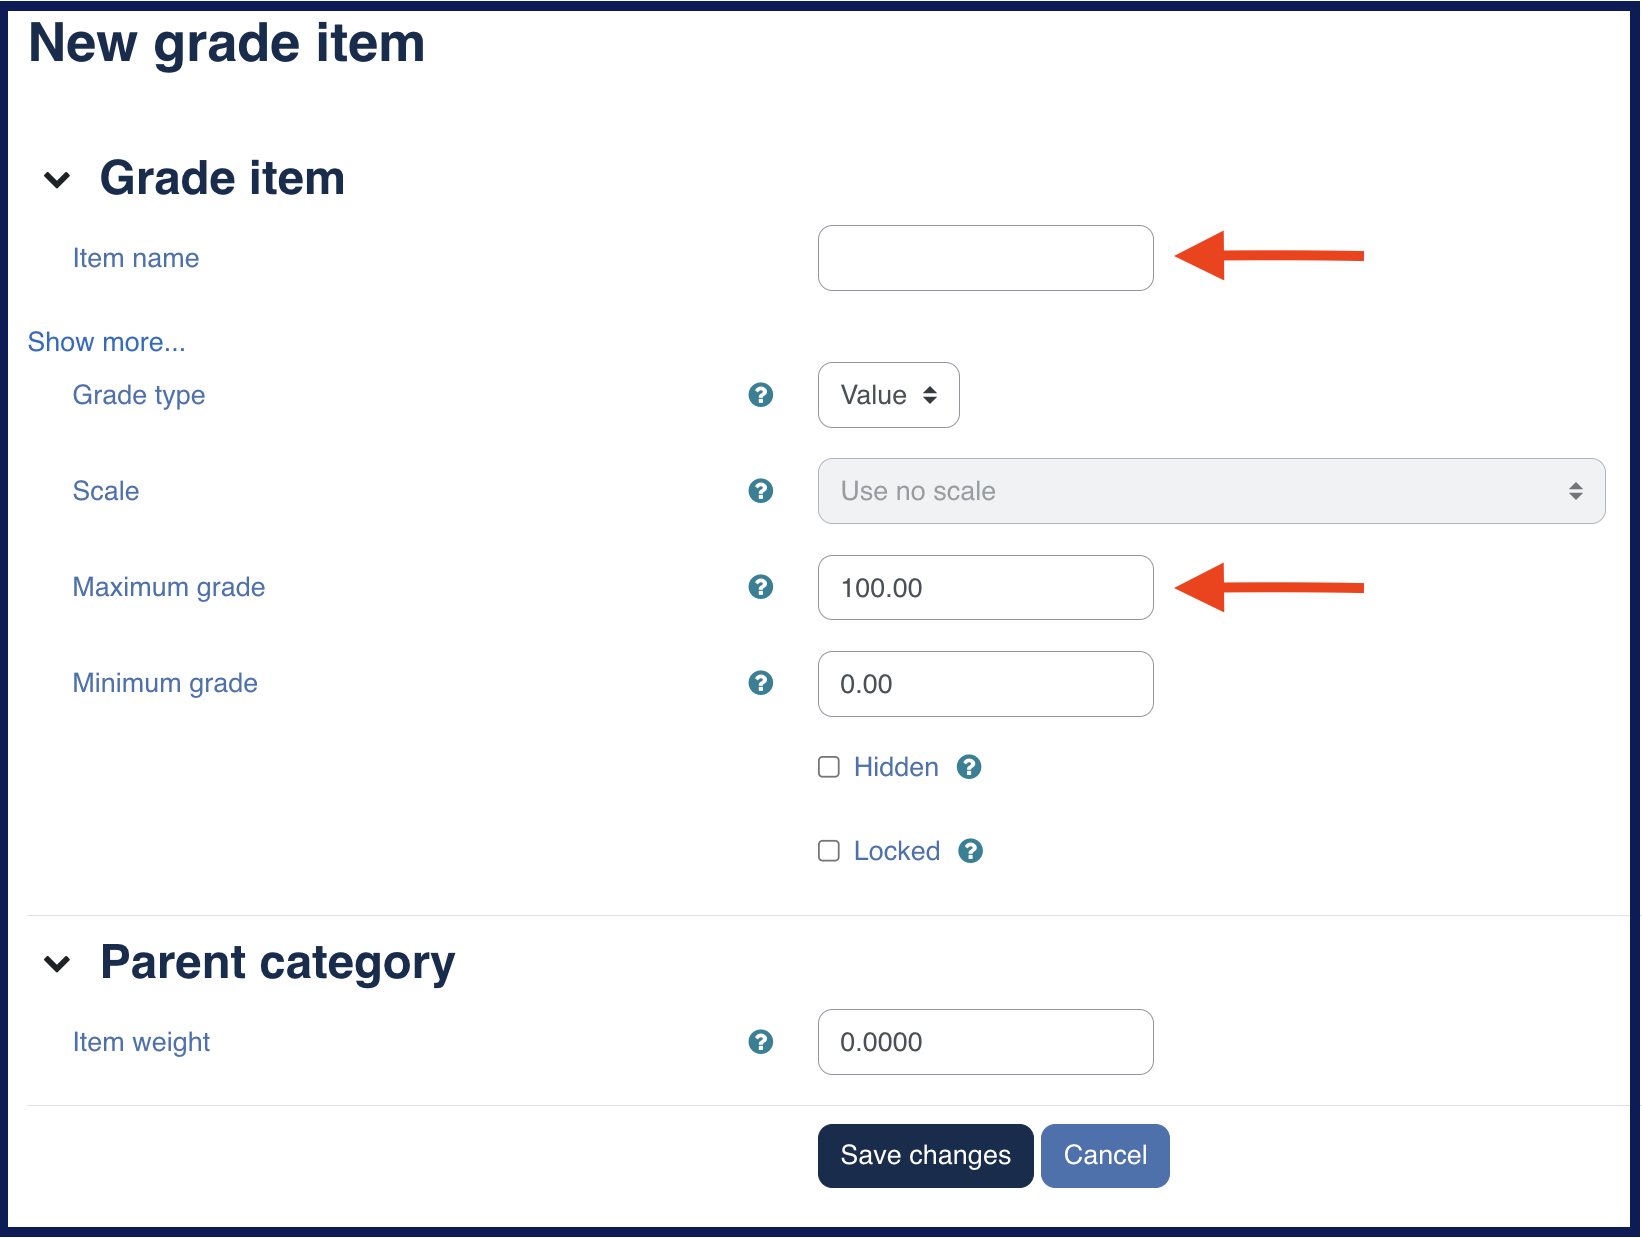
- Click the blue Add Grade Item button at the top of the page
- You can now enter the details for the grade item, including the Item Name, Maximum Grade and Grade Category.
How do I add a new grade category?
If your grading structure is broken into categories, where each category carries a percentage of a grade (i.e. Research 20%, Quizzes 35%, Participation 10%), it will be useful for you to add grade categories in your gradebook. A grade category can contain multiple items and a weight can be added to the grade category if you are using a grading aggregation that provides the option for weighting (i.e. Weighted Mean of Grades).
- Select Grades from the menu at the top of the course page under the course name.
- On the Grades page, drop down the menu in the upper left and select Gradebook setup.
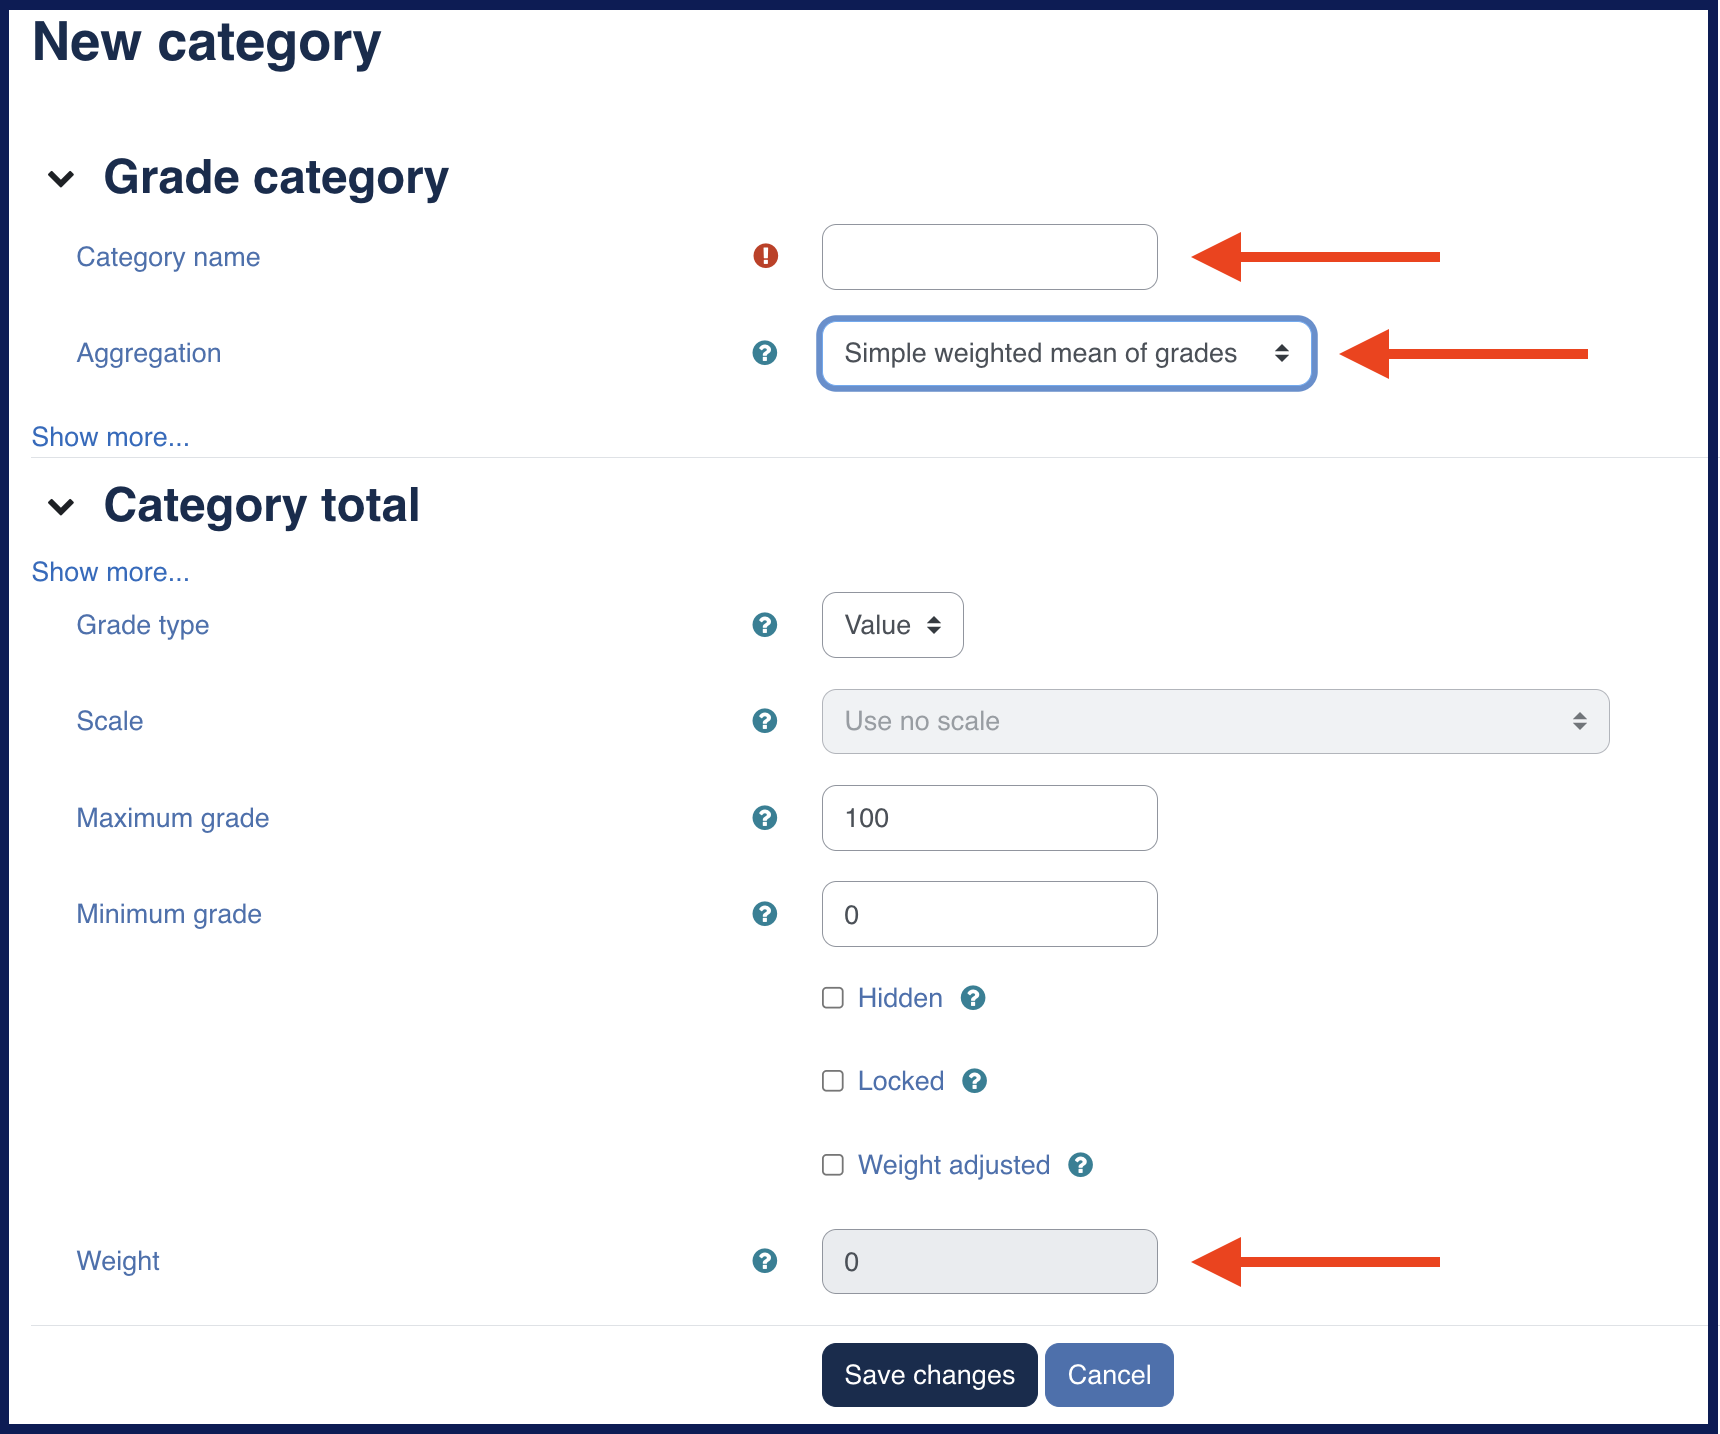
- Click the blue Add Category button at the top of the page
- You can now enter the details for the category, including the Category Name, Aggregation and Weight.
Once you have established categories for your course. Your grade items can be added to these categories at any time. You can add a category to a new or existing grade item.
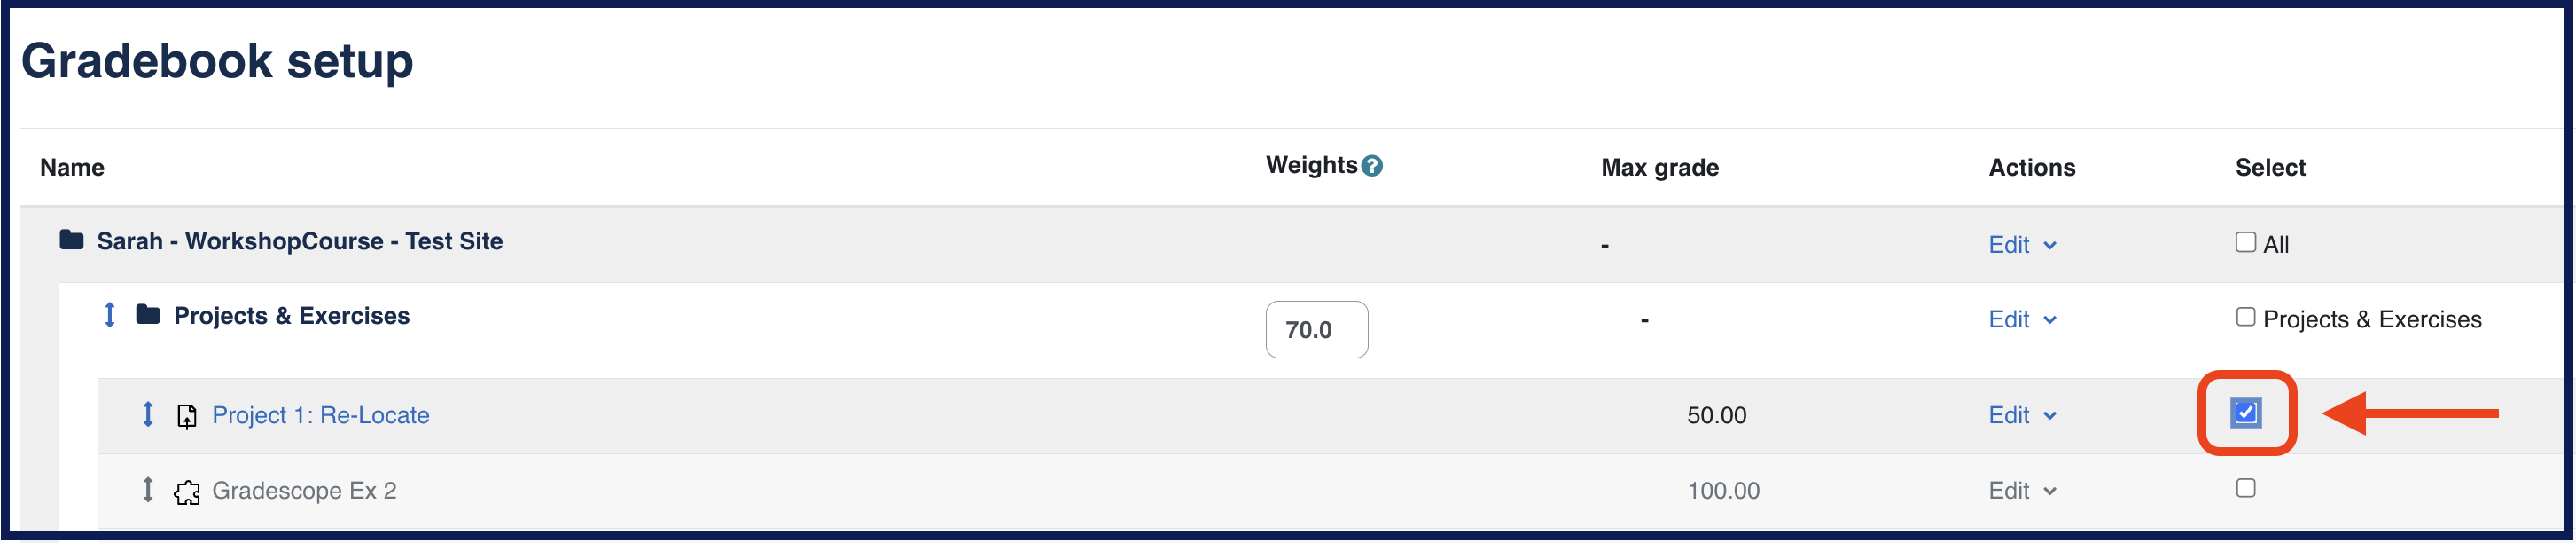
How do I add a category to an existing grade item/activity?
To add a grade category to an existing assignment, quiz or grade item:
- Select Grades from the menu at the top of the course page under the course name.
- On the Grades page, drop down the menu in the upper left and select Gradebook setup.
- Check the Select box to the right of the grade line you would like to add to a category.
- Scroll to the bottom of the page, where you will see Move selected items to
- Open the dropdown menu here to select the category you would like to move this grade line to.
- A pop-up window will appear, asking you if you would like to Leave the site. Click Leave. Your change will now be in place.
How do I override a grade?
To make a change to an individual assignment or quiz grade:
- Select Grades from the menu at the top of the course page under the course name.
- By default this should bring you to the Grader Report page.
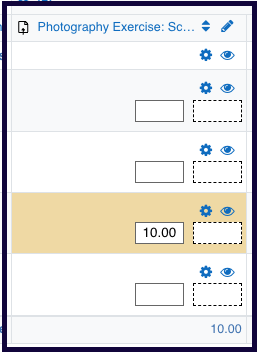
- Turn Edit Mode on.
- You will now see two boxes within each grade item (for each student). The solid box is for the grade and the dotted box is for feedback.
- Make an edit to the grade or to the feedback and click Save Changes.
A grade override will be indicated with a golden yellow background.
Course administration
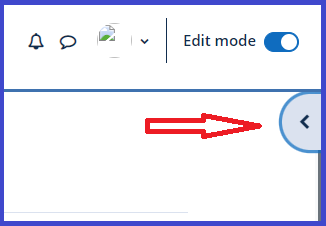
Where are the blocks and how do I add a block?
The blocks are still located on the right side of the Moodle page, in a collapsible “block drawer.” Open the block drawer by selecting the arrow in the upper right corner of the Moodle page below the Edit mode slider.
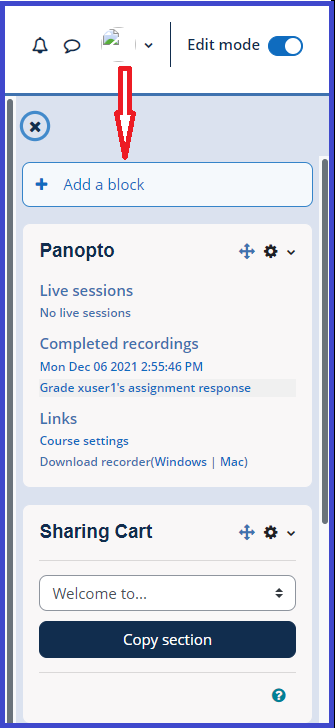
Once the block drawer is expanded you will see a link to Add a block.
What are the differences between Home, Dashboard and My Courses?
Each of these pages include links to courses your are enrolled in but each also has a specialized purpose:
- Home is a space for Moodle administrators to share news, information and sitewide announcements. You cannot sort, filter or arrange the order of your courses that appear at the bottom of this page.
- Dashboard is a space for reviewing your calendar and upcoming events alongside links to your courses. The Dashboard can be customized to fit your needs.
- My Courses is exclusively for listing links to your courses. You can sort, star or filter your list of courses for quicker access.
How do I customize my Moodle Dashboard?
First, turn editing on using the Edit mode slider in the upper right corner of the Dashboard page. Items on the Dashboard page are called blocks. Additional blocks can be added by selecting the Add a block bar at the top of the main body of the page or in the collapsible block drawer on the right.

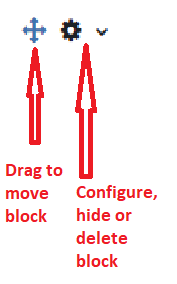
Additionally, blocks can be moved by dragging the block using the double-ended arrow icon. Use the gear icon to further configure the block, hide or delete the block.
To discard all of your modifications, use the Reset page to default button in the upper right corner of the main body of the page.